Categories
In this article
- What is eDiscovery search?
- How to run an eDiscovery search in a Core eDiscovery case?
- What is Content search?
- How to run a Content search?
- When to use eDiscovery search and Content Search?
Microsoft eDiscovery vs. Content Search: A Comparison
15 Apr 2025
4 min read
Ahana K.B.
Article at a glance
- eDiscovery is designed for legal and regulatory investigations, enabling case management, holds, advanced search, review, and export workflows.
- Content search is a simpler tool used for locating and exporting data across Microsoft 365 services, but it lacks features such as legal hold, review sets, and case management.
What is the recommended approach?
Use eDiscovery for legal and compliance scenarios, and Content search for broader, non-legal data retrieval tasks.
As of 2025, 63% of enterprises are managing over 100 TB of data, making it increasingly difficult to identify specific content, even when data is efficiently organized.
1. What is eDiscovery search?
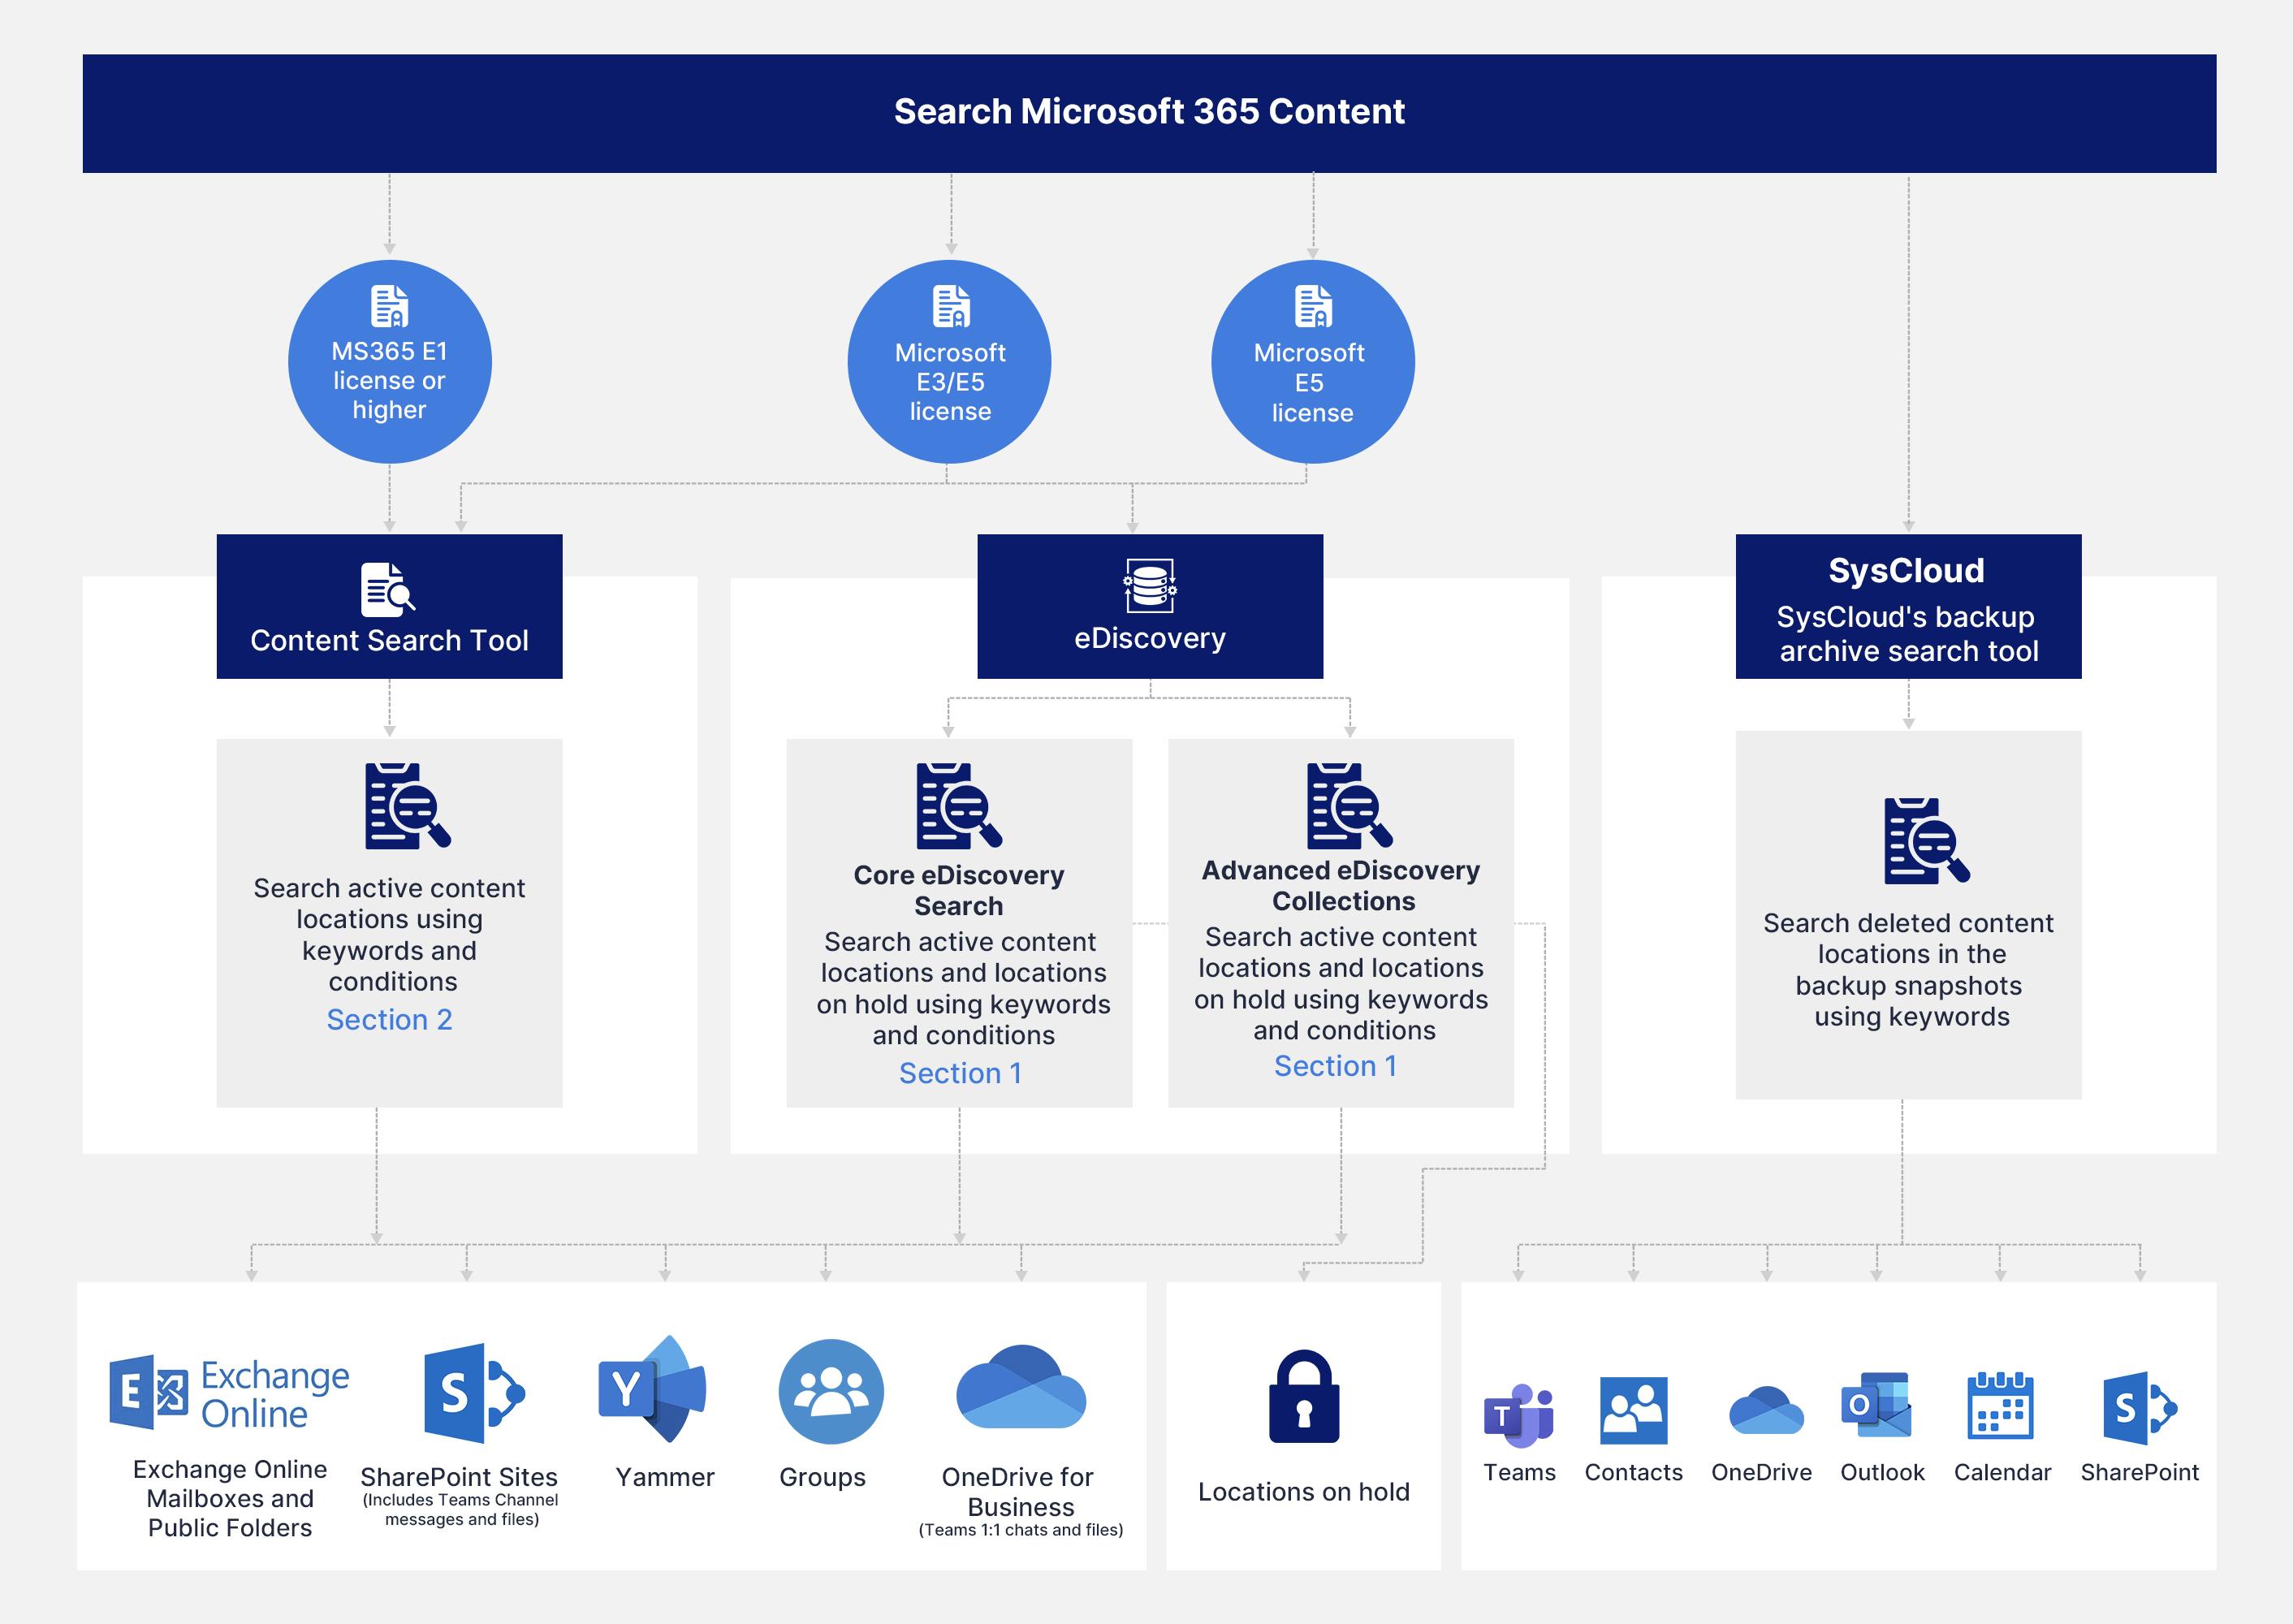
Microsoft eDiscovery search is available within the Microsoft Purview Compliance Portal, using either Core or Advanced eDiscovery tools. It allows authorized users to run targeted content searches using keywords and conditions across various Microsoft 365 data sources.
Note: Searches are referred to as “Collections” within an Advanced eDiscovery case.
1.1. What is the license requirement for eDiscovery search?
A Microsoft 365 E3 or equivalent license is required for Core eDiscovery. A Microsoft 365 E5 or Microsoft 365 E3 + eDiscovery and Audit add-on license is required for Advanced eDiscovery.
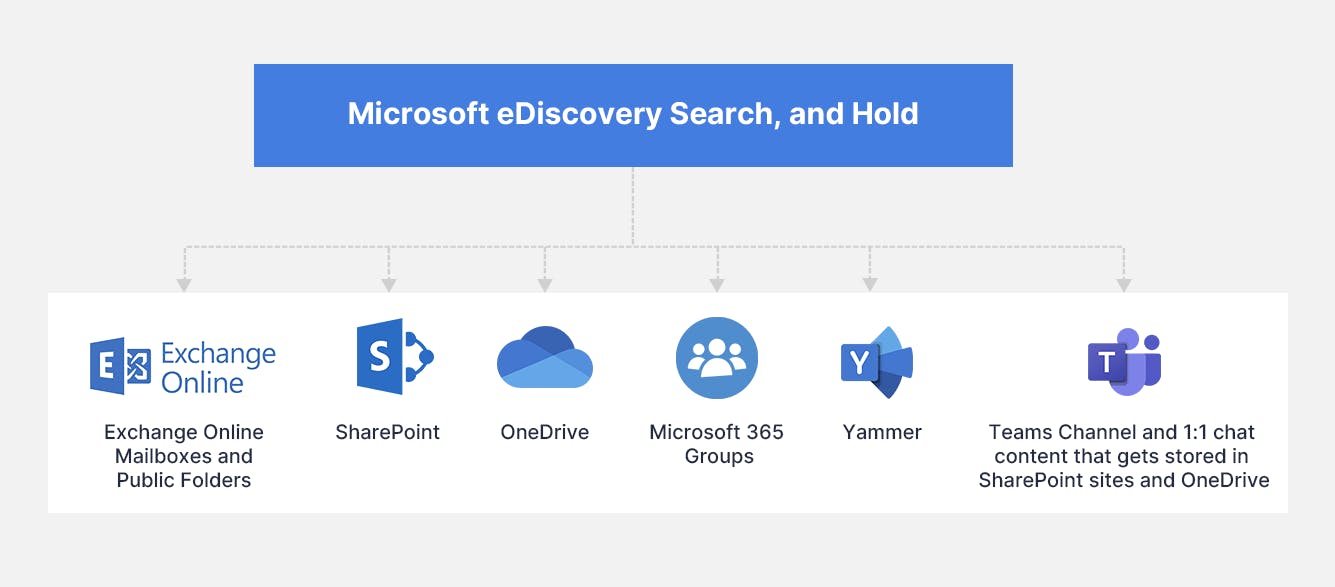
1.2. What are the data sources that are included in eDiscovery search?
- Exchange Online mailboxes (including public folders)
- SharePoint Online sites
- OneDrive for Business accounts
- Microsoft Teams (Teams messages in channels are stored in SharePoint, 1:1 and group chats are stored in user mailboxes)
- Microsoft 365 Groups and Yammer Groups
Additionally, administrators can select the “Locations on hold” option during search creation to scan content in held locations.
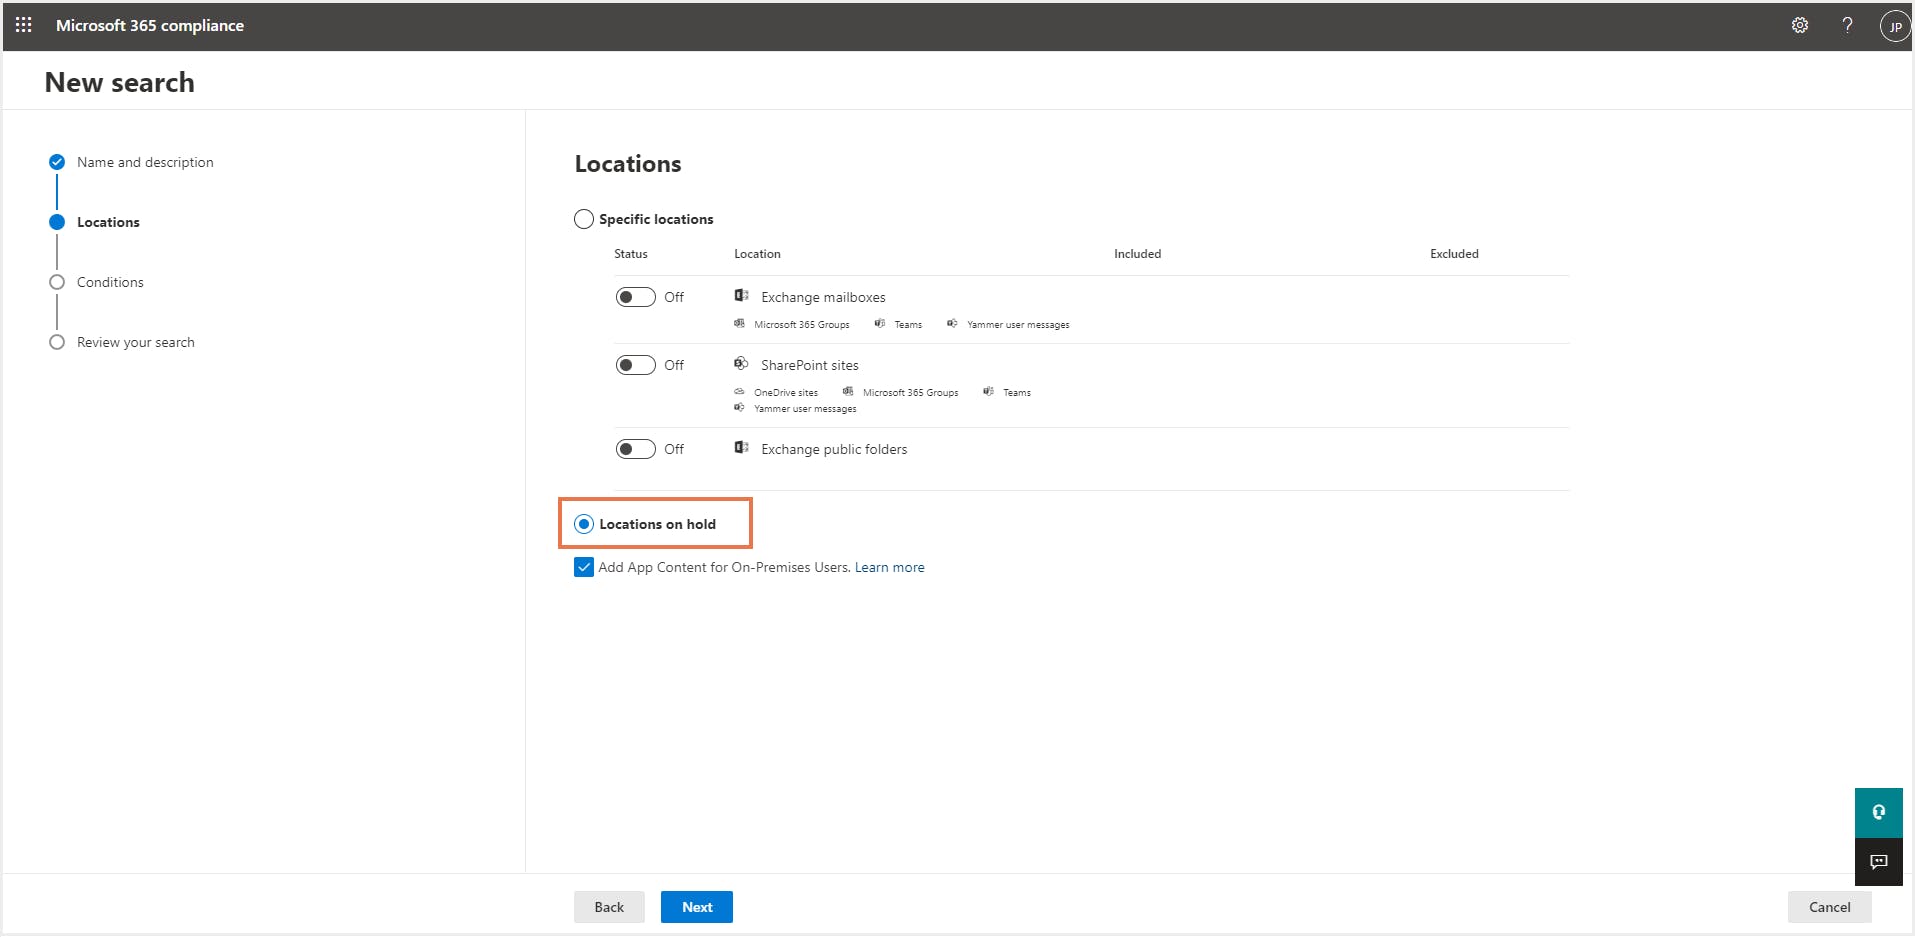
1.3. eDiscovery search criteria
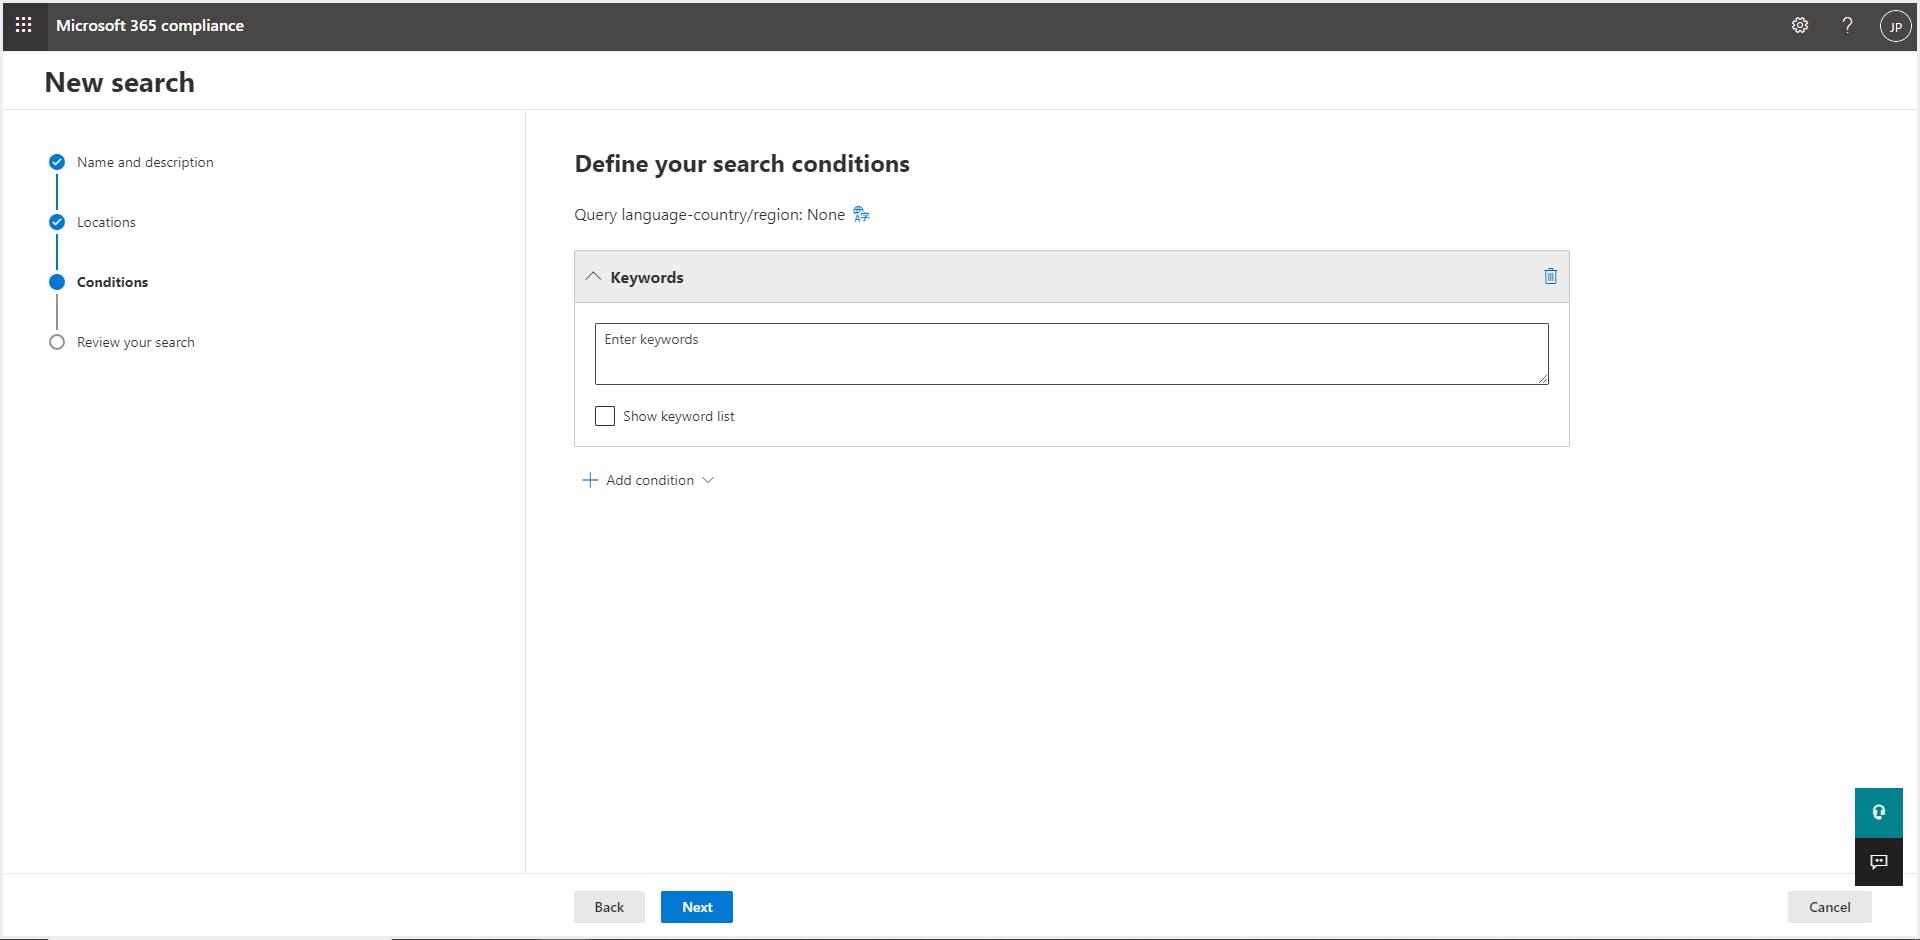
1.4. How to run an eDiscovery Search?
Step 1: Go to the Microsoft Purview Compliance Portal, navigate to the Solutions section in the left-hand menu, and select eDiscovery.

Step 2: Under the eDiscovery section, click on Cases. You can either:
- Click on an existing case to open it, or
- Click “+ Create a case”, provide a name and an optional description, and then click Save.
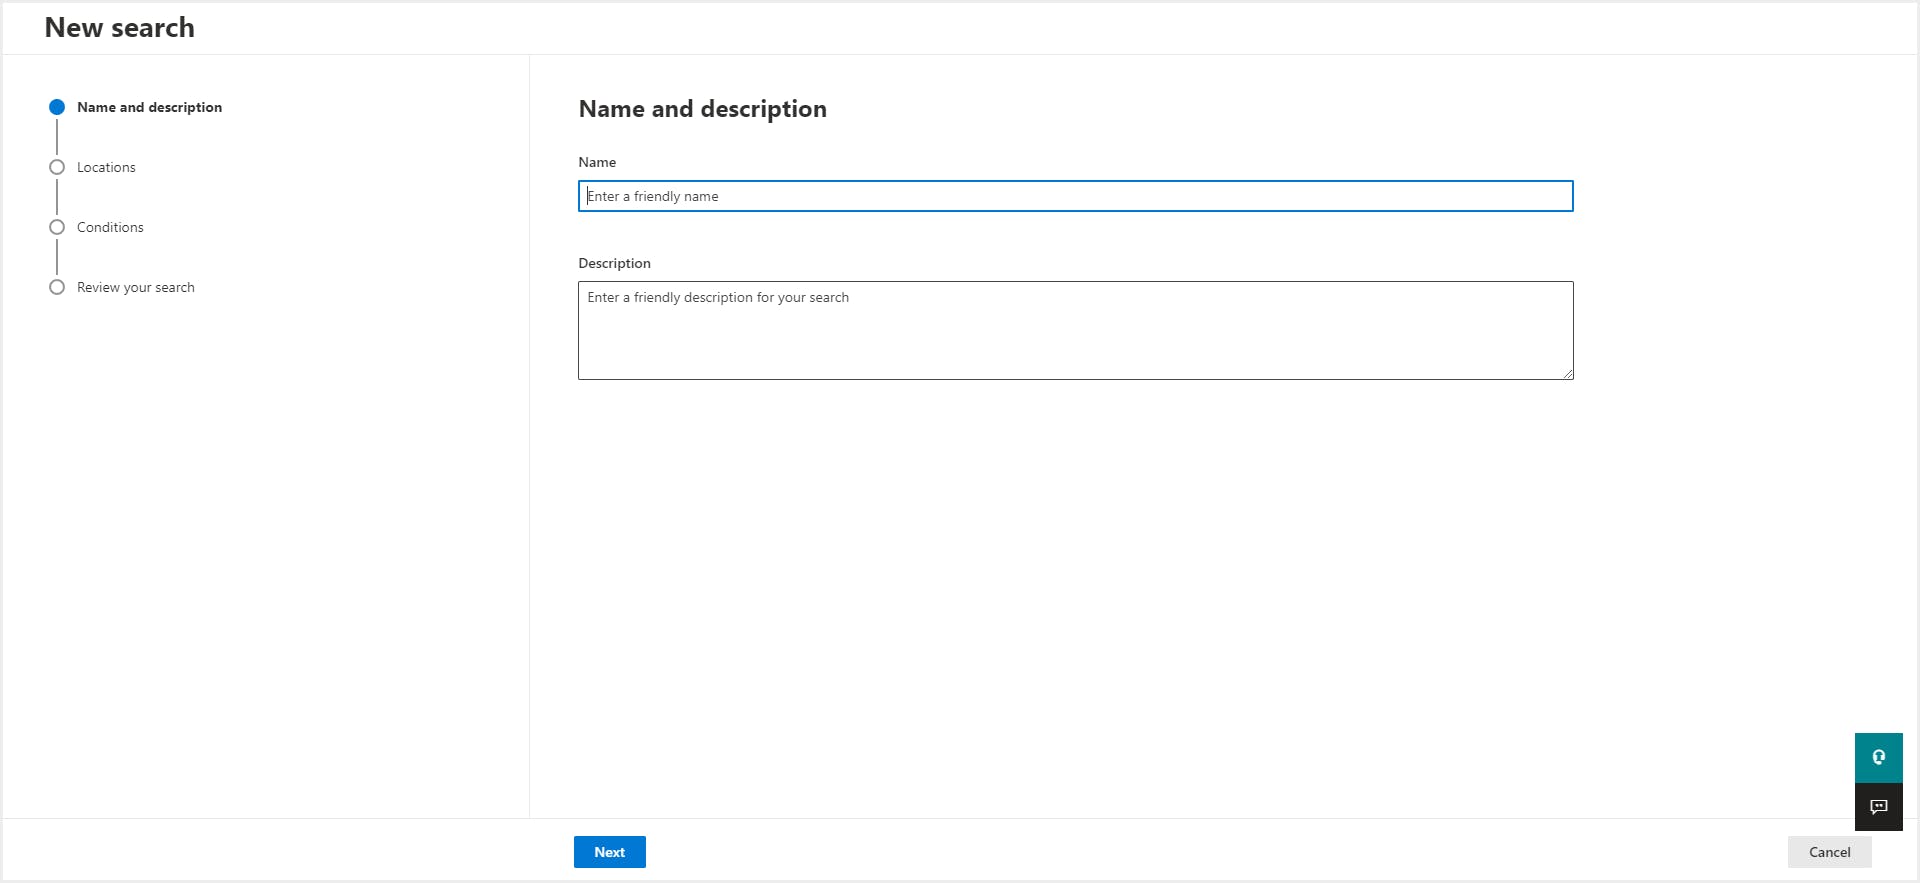
Step 3: Click “+ Create search” to begin setting up a new search. Provide a name and an optional description for the search. Click Next.


Step 4: Configure Search Criteria
- Select data source (e.g., Exchange mailboxes, SharePoint sites, OneDrive accounts, Groups, Teams, etc.)
- Enter keywords or KQL queries
- Apply filters/conditions (optional), such as: Date ranges Participants (sender/recipient) File types Message types (email, Teams chat, etc.)
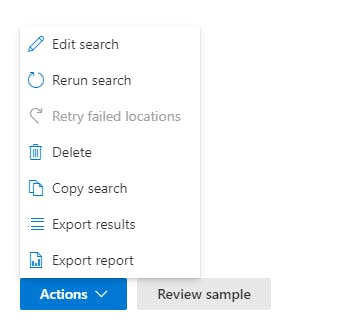
When finished, click "Run query".Step 5: After submitting the search, you can take actions such as edit, rerun, or export results. Exported results can be downloaded as a .csv summary report or a .zip file containing the actual content.
2. What is Content search?
Content search is a search tool available in the Microsoft Purview Compliance Portal. While it is part of the same compliance framework, it operates independently from the eDiscovery tools and does not offer case management, legal hold, or review capabilities.
2.1. What is the license requirement for Content search in Microsoft 365?
Content search is available with most Microsoft 365 business and enterprise plans, including Microsoft 365 E1, E3, and E5. Users must be assigned the appropriate Compliance Center roles (e.g., Content search or eDiscovery Manager role group) to access the feature.
2.2. What are the data sources that are included in Microsoft 365 Content search?
- Exchange Online (including email, calendar, and Teams 1:1/group chat messages stored in mailboxes)
- SharePoint Online (includes Teams channel messages)
- OneDrive for Business
- Microsoft Teams (chat and channel messages via mailbox or site storage)
- Yammer Groups
- Microsoft 365 Groups
- Skype for Business (if configured for archiving)
2.3. Content search criteria
- Add a name and optional description
- Choose specific locations to search (e.g., mailboxes, SharePoint sites)
- Use Keyword Query Language (KQL) to build advanced queries
- Add conditions (e.g., date, sender, subject) to narrow the results
- Upload a .csv file of message IDs to locate specific emails
- Export results to a local computer
- Export a detailed search report
- Use the Search and Purge feature (only for Exchange Online) to delete matched email items
2.4. How to run a Content search?
Step 1: Navigate to the Microsoft Purview Compliance Portal. Select Content search from the navigation pane.
Step 2: Click “Search from the top menu bar. Click “+New Search”.
Step 3: Type a name and description (optional) for the new search. Click “Next”.

Step 4: Choose the Microsoft 365 locations where you want to search for content. For example:
- Exchange mailboxes – specific users, groups, or Teams (1:1 and group chat messages are stored here)
- SharePoint sites – including SharePoint-backed Teams channels and Microsoft 365 Group sites
- OneDrive accounts – including Teams media files shared in private chats
- Microsoft 365 Groups and Yammer Groups
You can also paste a SharePoint or OneDrive URL directly to target a specific location. Click Next to proceed.Step 5: Add conditions for the search if needed. This could include specific keyword(s) and add conditions to search for the keyword. Click “Next”.


Step 6: Review the search configuration, including name, selected locations, and any conditions or keywords applied.
Click Submit to initiate the search. Once completed, administrators can take the following actions:- Edit or rerun the search if needed.
- Export results: Emails are exported in PST format Documents retain their original file types. A CSV report provides metadata and summary of exported content.
- Use Search and Purge (only for email items in Exchange Online) to delete matched items, if necessary.

3. When to use eDiscovery search and Content search?
The eDiscovery search tool is available within Core and Advanced eDiscovery features in the Microsoft Purview Compliance Portal. It is typically used in scenarios involving litigation, regulatory compliance, or internal investigations. Because it supports case-based workflows, legal hold, and auditable export actions, eDiscovery search is ideal for identifying and preserving content that may serve as potential evidence for legal counsel.
In contrast, the Content search tool is best suited for broad data retrieval needs that do not involve legal or compliance requirements. It lacks legal hold, review sets, and role-based case management. While it can search across most Microsoft 365 data sources, it does not allow searching specifically within content placed on hold (this is reserved for eDiscovery). Content search is primarily used to locate and export content for operational, IT, or auditing purposes.
Recommended content
15 Apr 2025
8 min read
15 Apr 2025
5 min read
26 Oct 2021
6 min read
Get actionable SaaS administration insights
We don’t spam. Unsubscribe anytime.
In this article
- What is eDiscovery search?
- How to run an eDiscovery search in a Core eDiscovery case?
- What is Content search?
- How to run a Content search?
- When to use eDiscovery search and Content Search?

