Categories
In this article
- Where is Google Sites data stored?
- Backup to another Google account
- Export using Google Takeout
- Retain using Google Vault
- Backup using third-party backup tools
Google Sites backup at a glance
- Manual methods like Google Takeout are not automated and have limitations.
- Deleted sites are moved to Trash for 30 days, after which they are permanently deleted, with limited recovery options.
- SysCloud offers automated, continuous backups for Google Sites, ensuring all site data is securely backed up and easily recoverable, with advanced recovery options for restoring entire sites or specific components.
How to Backup Google Sites
5 Jan 2022
7 min read
Ragavarshini
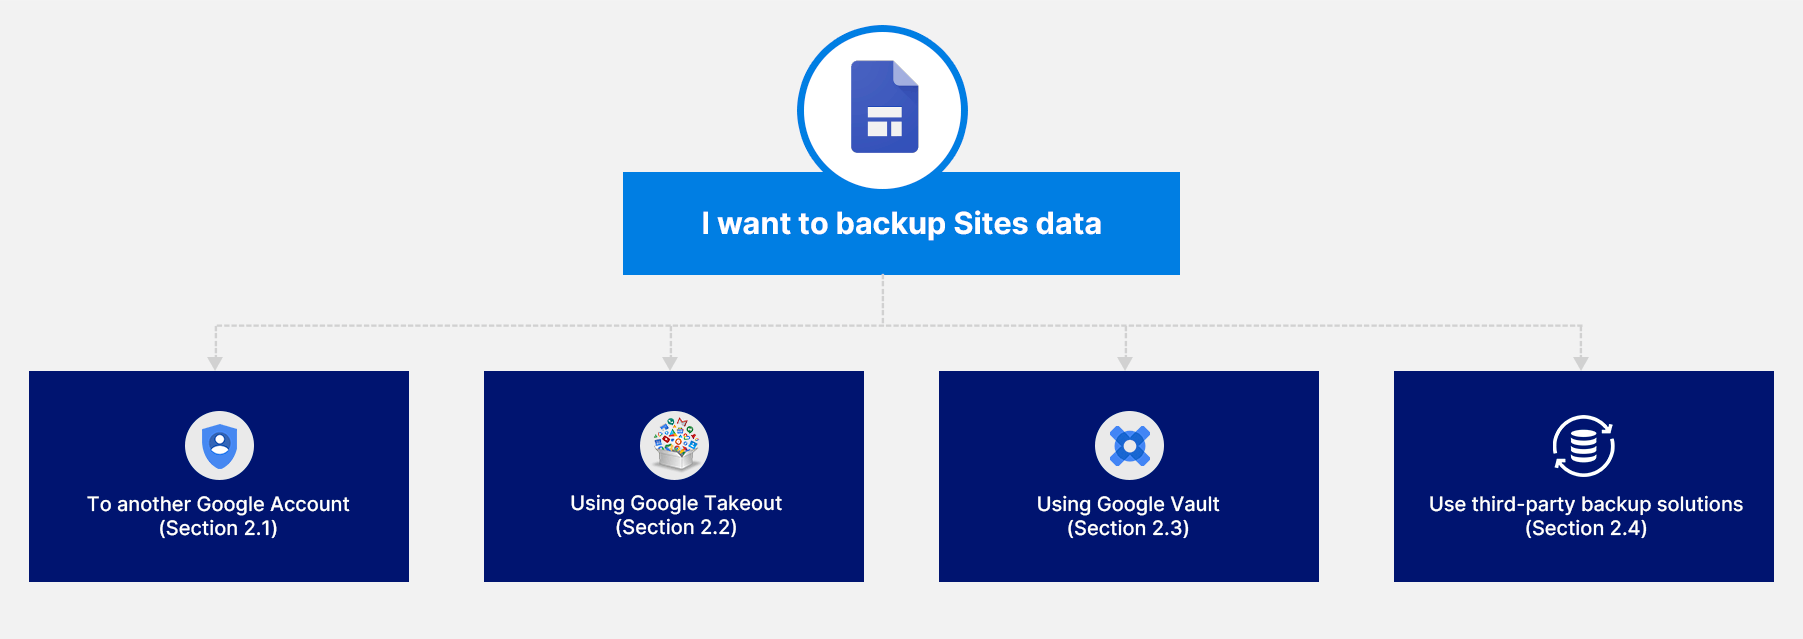
1. Where is Google Sites data stored?
Note:
1. Google announced that from January 1, 2023, classic Sites will no longer be viewable. To continue to view the sites, you must have converted and published them to the new Google Sites experience before January 1, 2023.
2. How to backup Google Sites?
2.1. Backup to another Google account
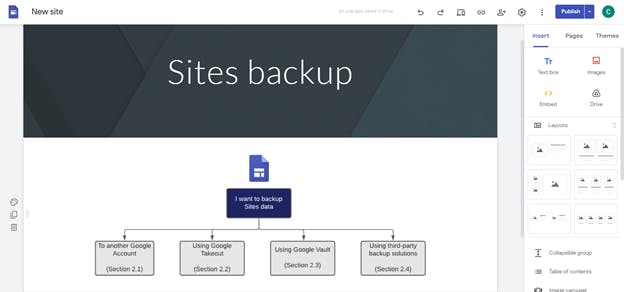
Step 1: Open the site you want to back up. Click the ‘Share with others’ button.
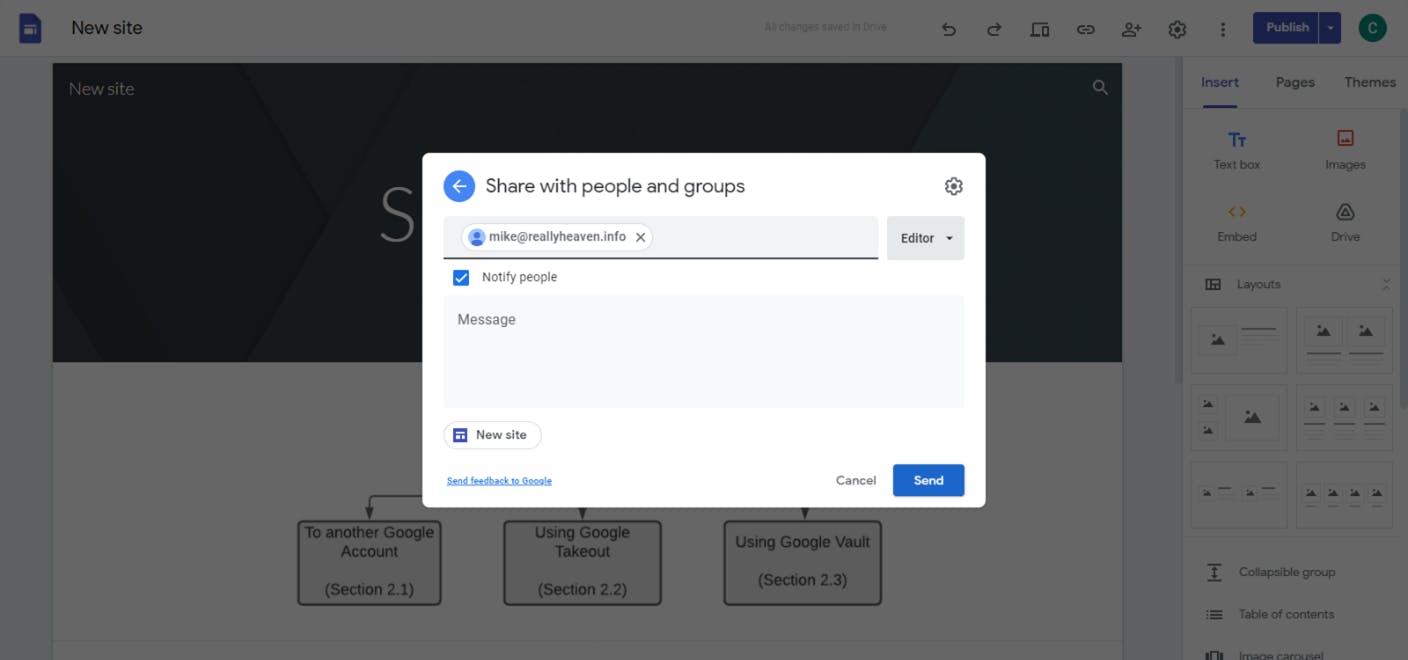
Step 2: Add the second Google account to which you want to back up the files. Set the sharing permission to ‘Editor’ and click ‘Send.’
Limitations
- Since it is a completely manual process, users can forget to share a new site. Hence, this is not a recommended backup option for businesses looking to avoid data loss.
- If the other user accidentally deletes the shared site from their account, the site is permanently deleted.
2.2. Backup Sites data using Google Takeout
Note: Takeout will only allow you to select top-level My Drive folders to export, so the sites you want to export need to be in one of those folders.
How to export Google Sites data using Google Takeout?
Step 1: Login to your Google account using your super admin credentials.
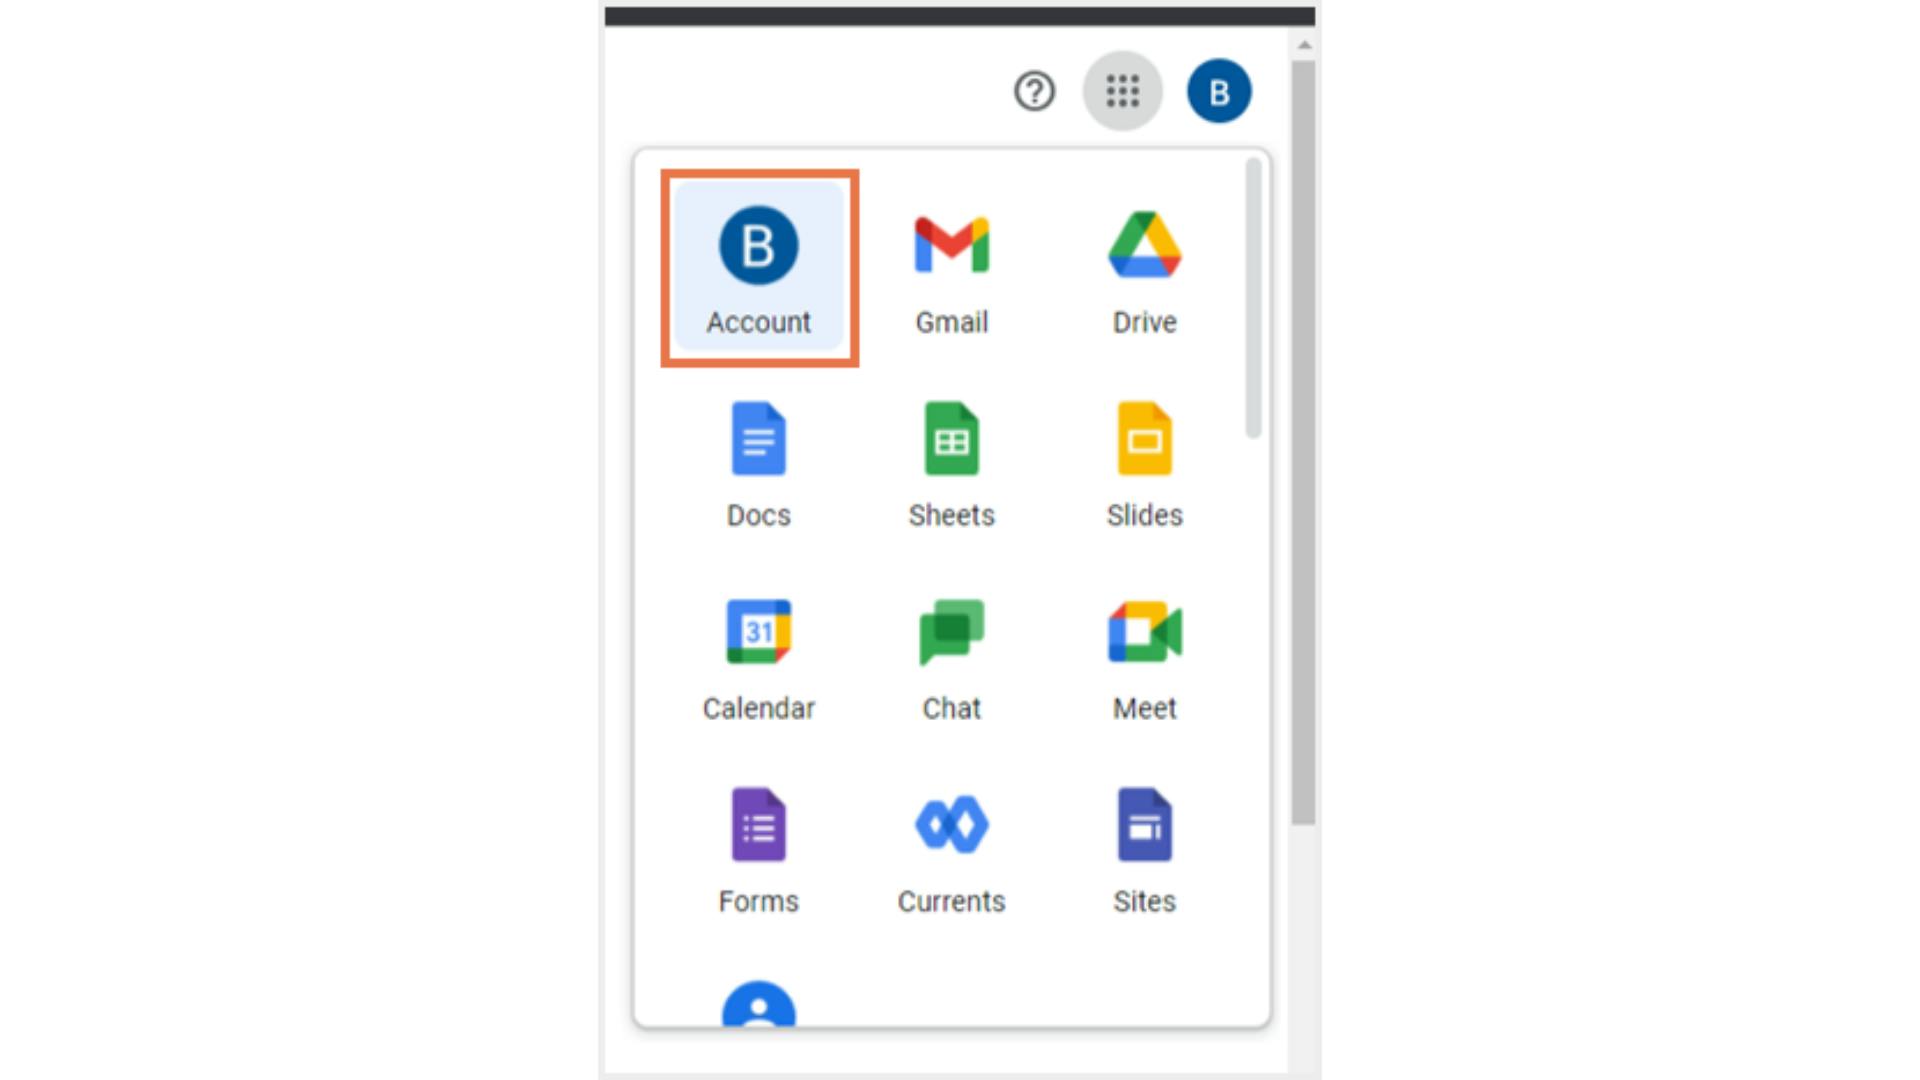
Step 2: From the Google waffle icon, select “Account.”
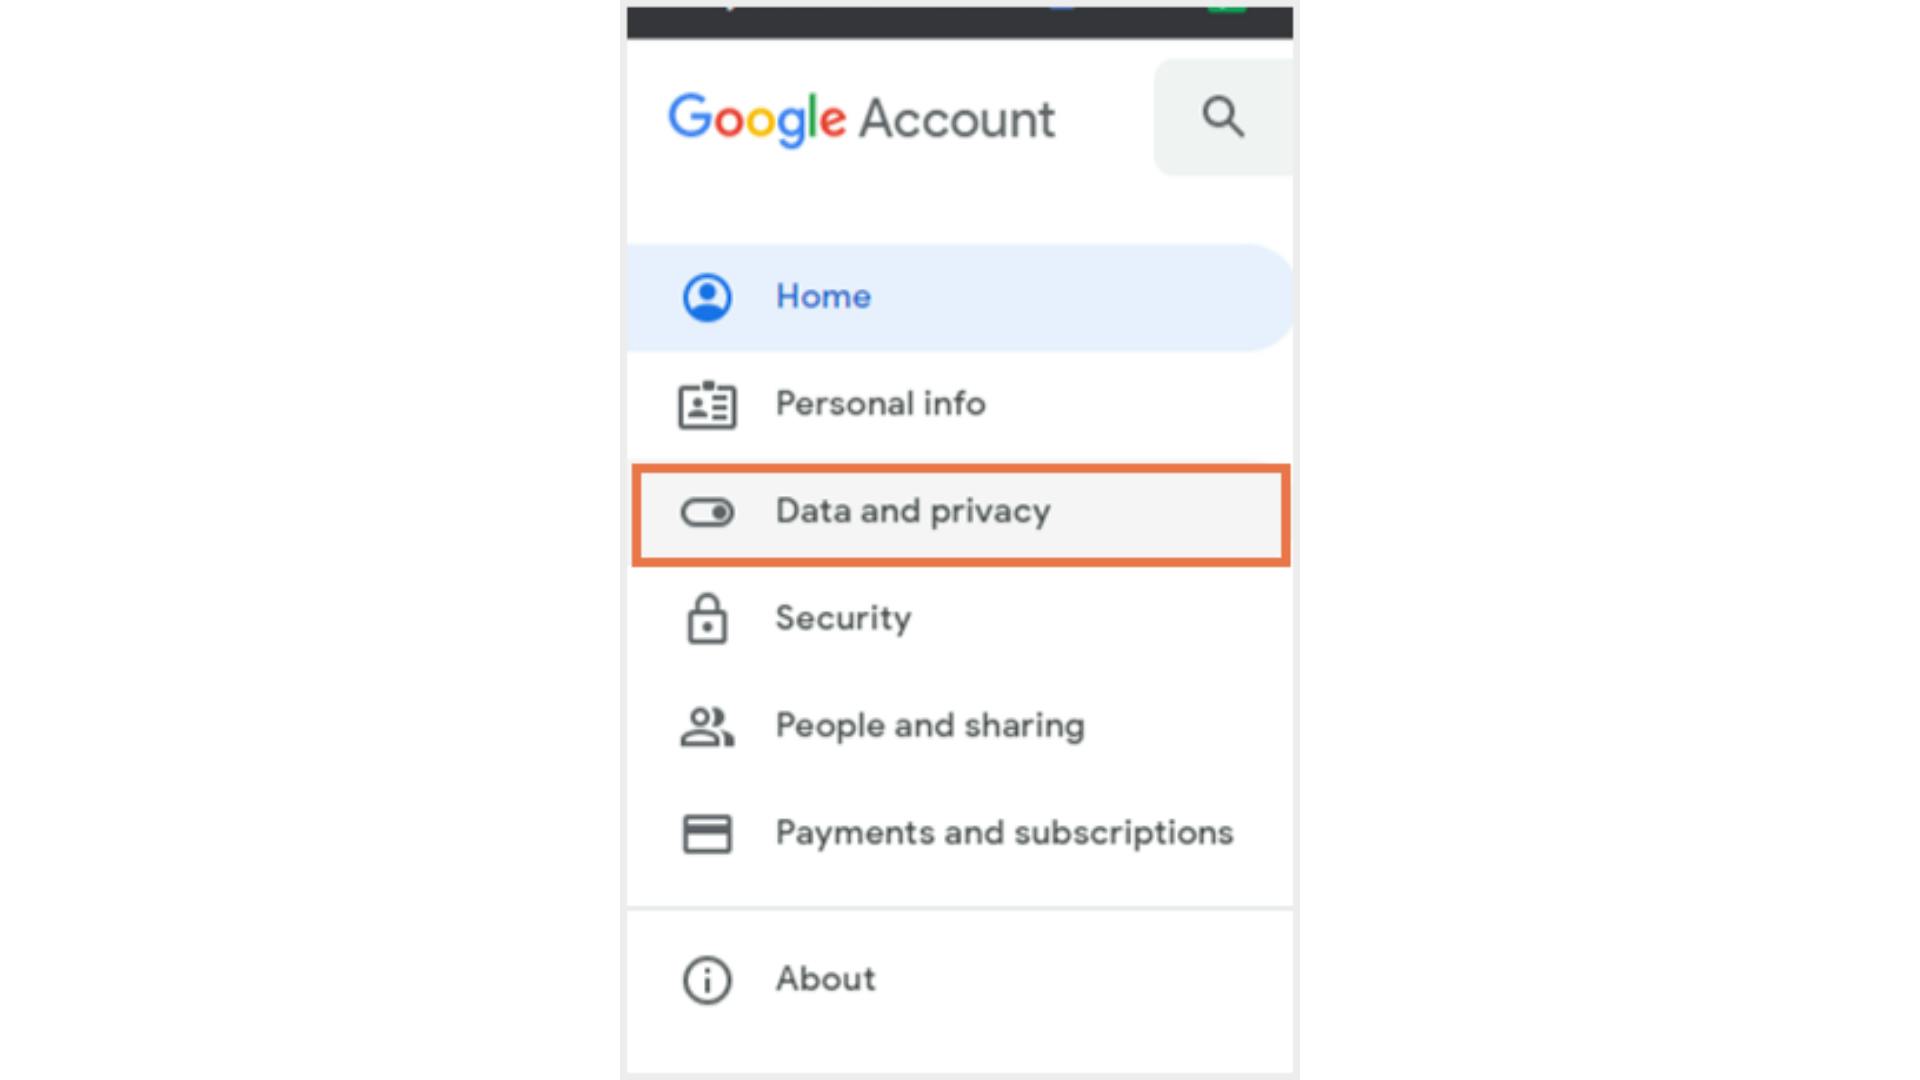
Step 3: Select “Data and Privacy” from the left-hand side menu bar.
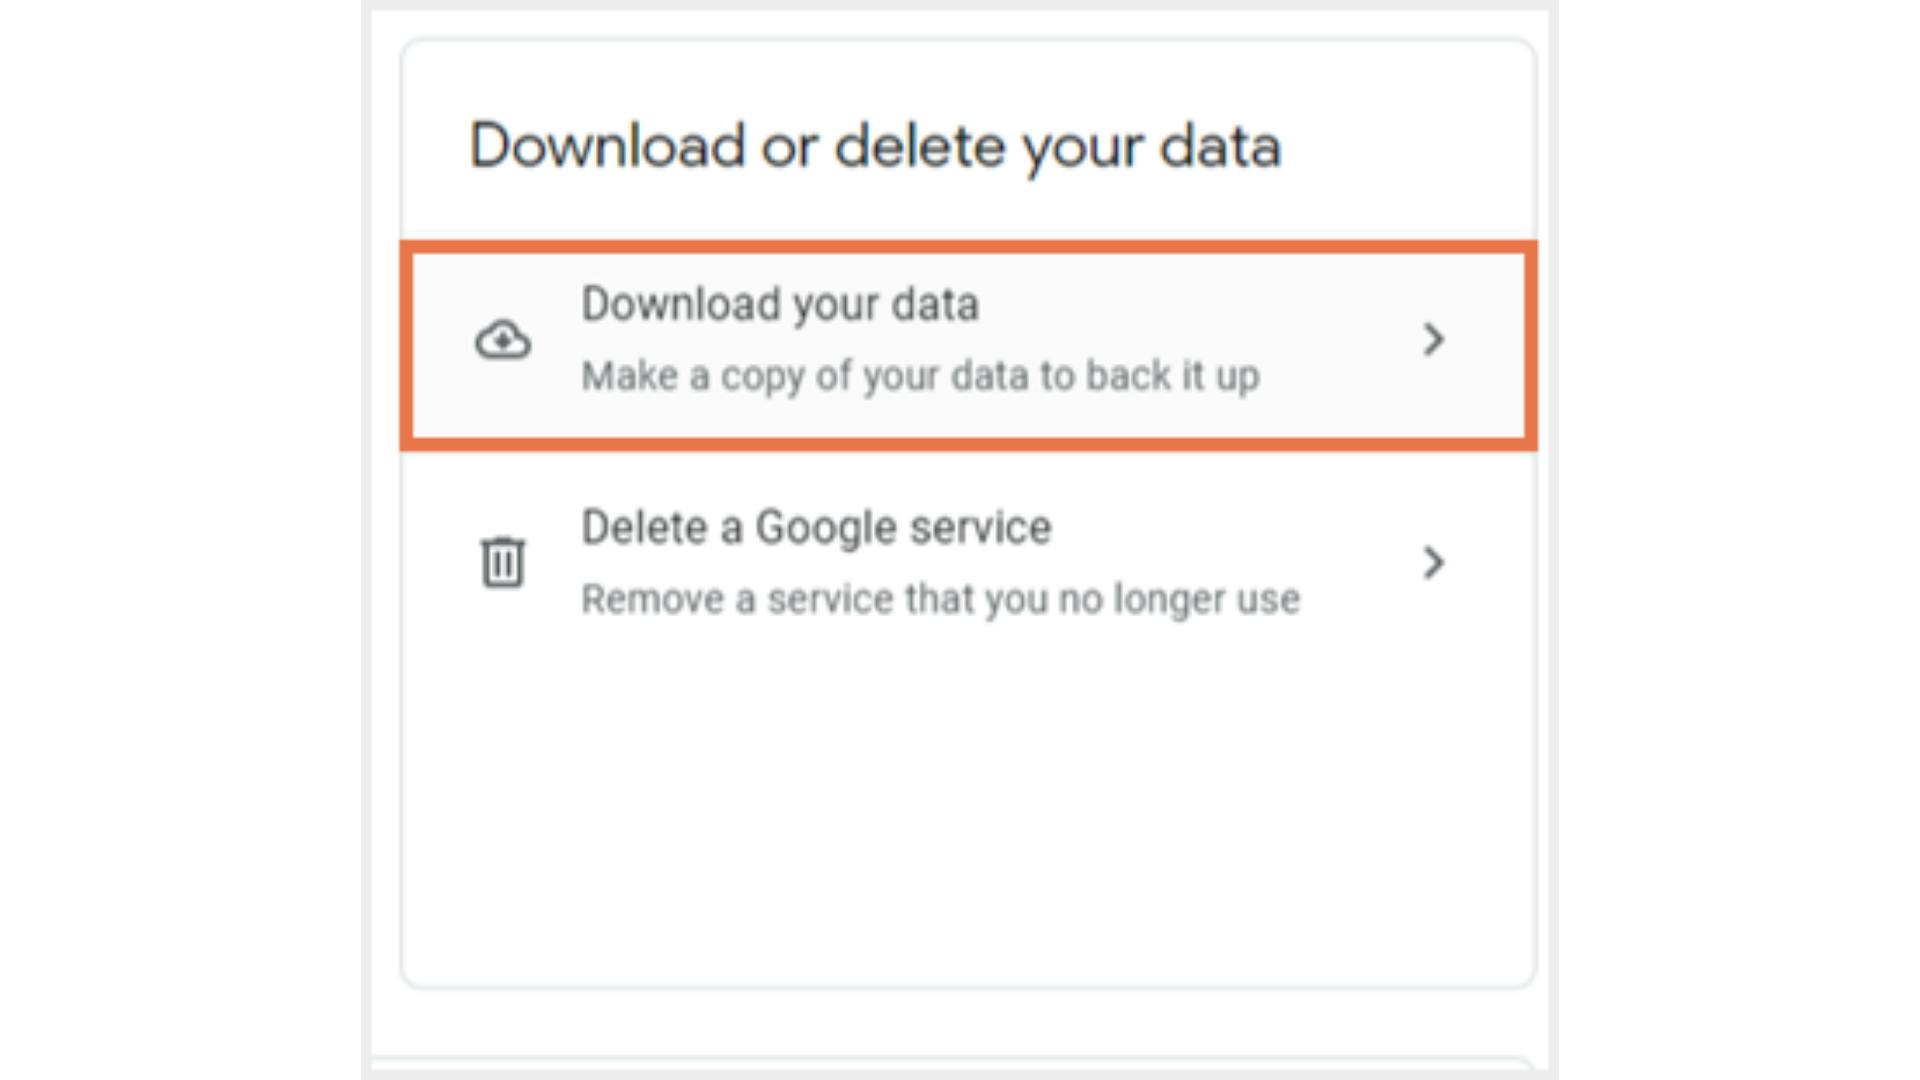
Step 4: Under the “Download or delete your data” section, select “Download your data.”
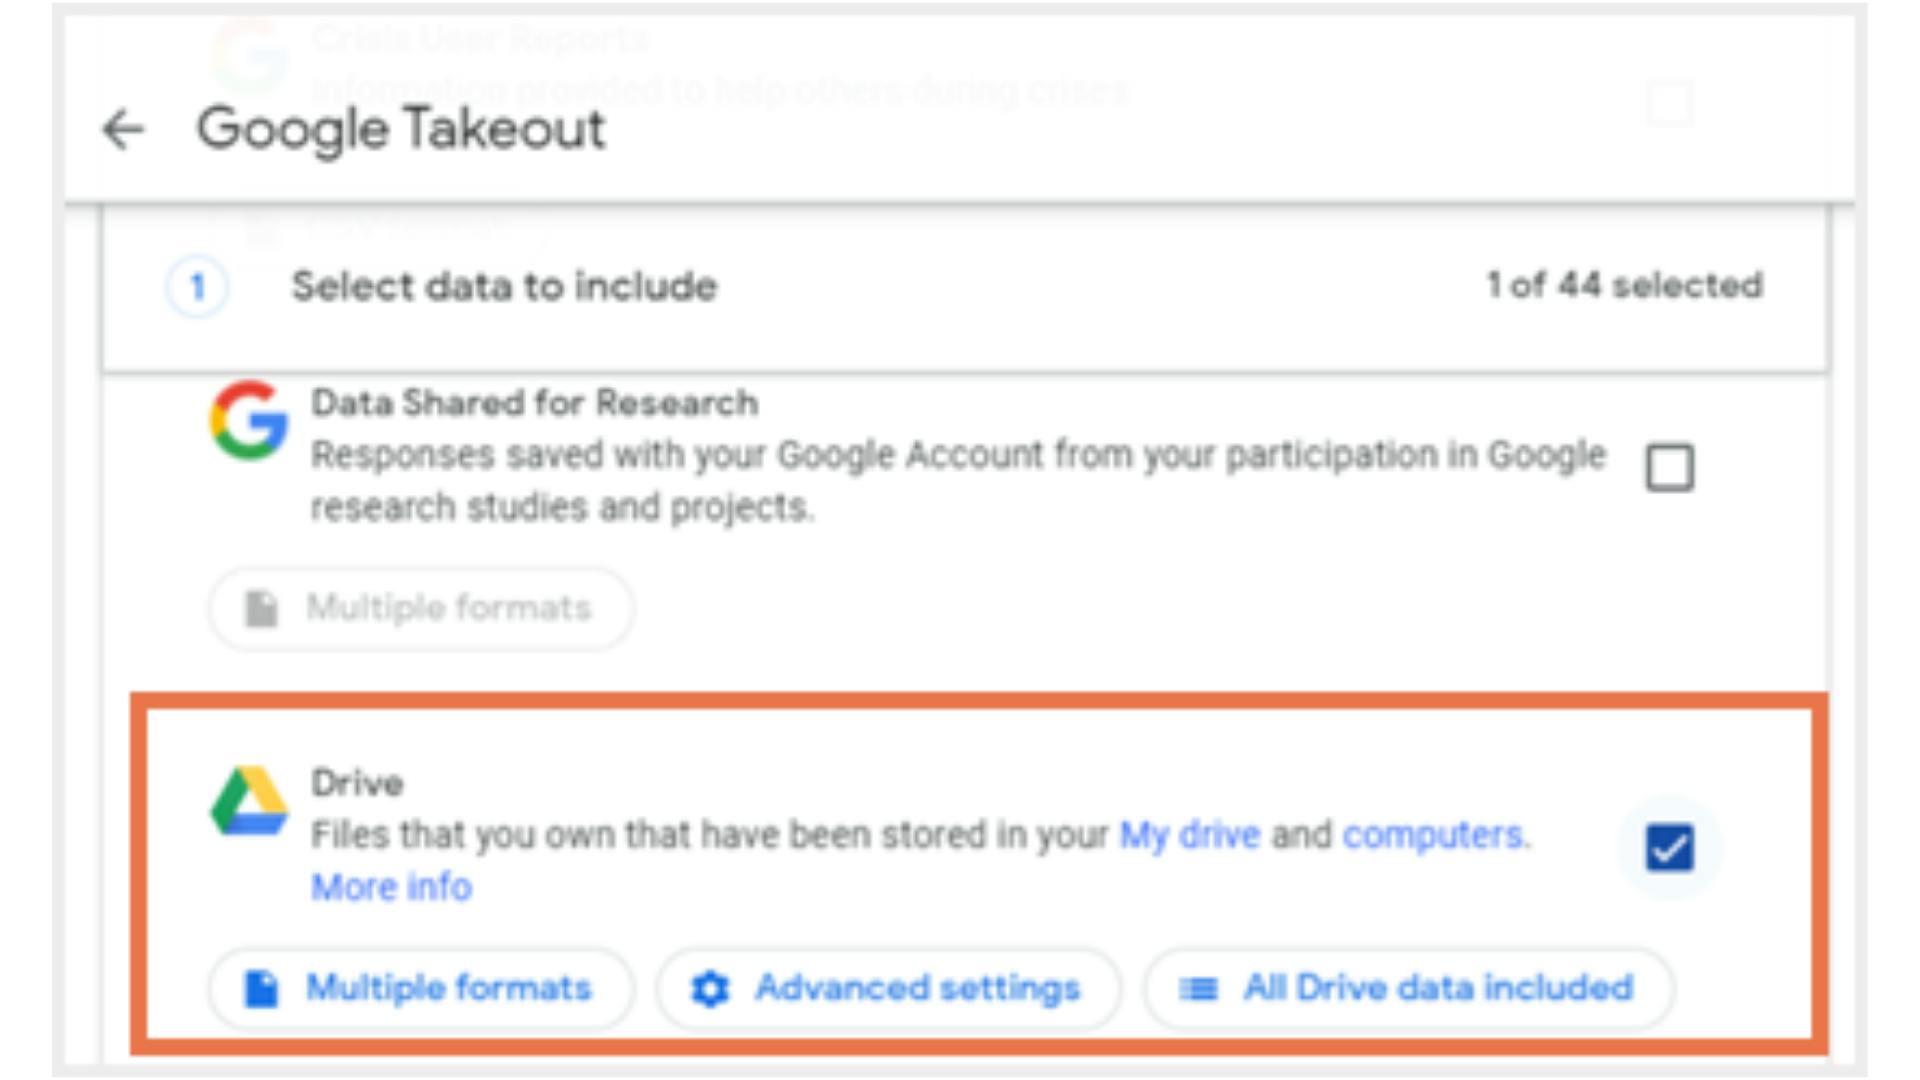
Step 5: Select ‘Google Drive’ (as new Sites are stored in Drive).
Step 6: Click on “Next step”.
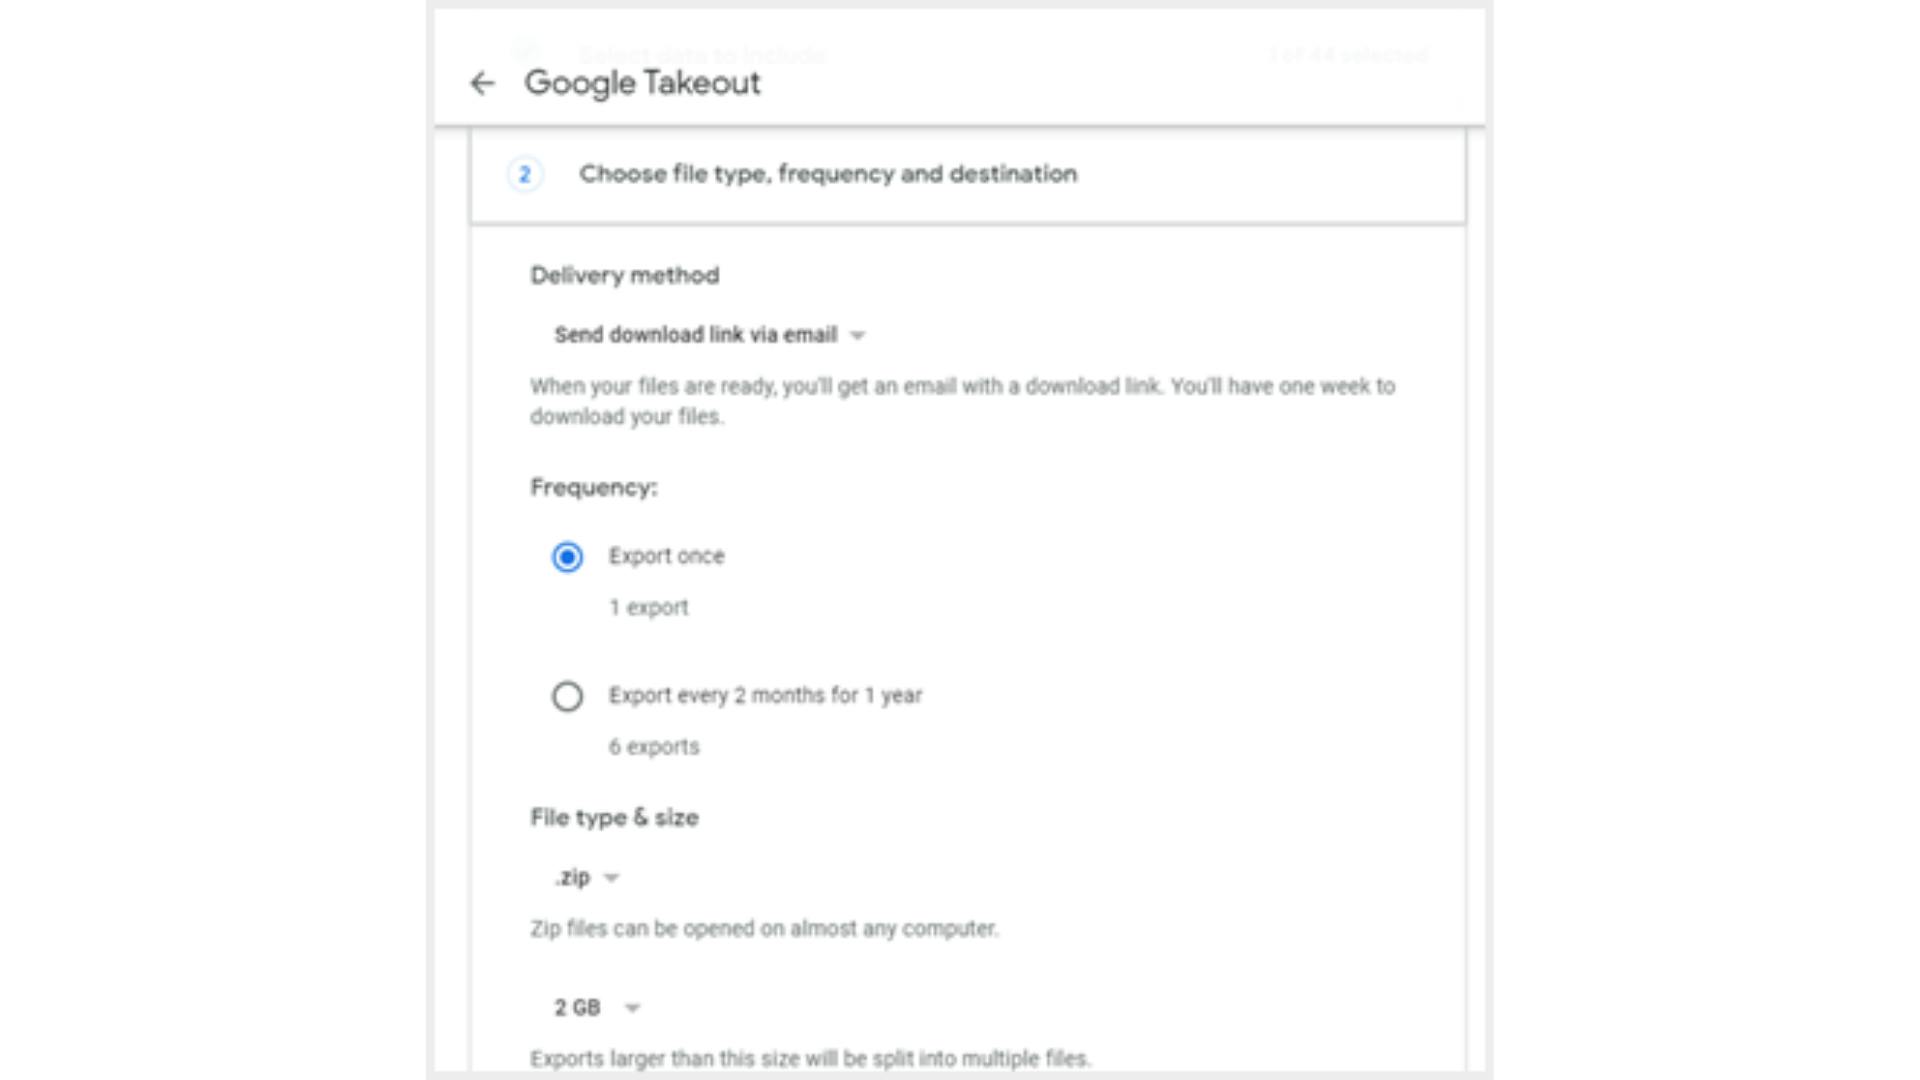
Step 7: Select the following:
- Under the “Delivery method” you can choose to add the downloaded data to your Drive, Dropbox, OneDrive, Box, or receive a link to the archive, in your email.
- Under “Frequency of export” you can choose to export the files once or once every 2 months.
- Under “File type & size,” you can choose between .zip or .tgz for the file type. After choosing all the options, click “Create export”.
Once the archive is ready, you’ll receive an email notification, or you can check the status on your Takeout page by selecting the “Manage exports” option.
Step 8: Click the “Download” button next to the created archive.
Limitations of Google Takeout
- Google Takeout is not a backup solution. The users must download their data manually. If internet access is lost, the download progress is interrupted and cannot be resumed. You will have to begin all over again!
- Google Takeout does not allow you to download files owned by someone else.
- Exporting data using Google Takeout can fail sometimes, making it an unreliable tool for backup.
- Even with a .tgz format, the maximum limit for an archive download is 50 GB/day
- You might end up with incomplete downloads while exporting larger files or folders.
2.3. Backup Sites data using Google Vault
Google announced that from April 2021, new Google Sites will be supported by Google Vault. This means that admins can use Google Vault to set retention policies for Google Sites, perform searches of Google Sites data, and export Google Sites content. Similarly, if an organization uses Google Vault to hold Drive files, it will be applicable to Sites as well.
To learn more on how you can create retention rules in Vault, check out our in-depth article on ‘A Guide to Google Sites retention’.
Limitations of Google Vault
2.4. Backup deleted Sites data using third-party backup tools
How to backup Google Sites using SysCloud?
Note: Due to API unavailability for New Google Sites, SysCloud backs up Classic Google Sites only.
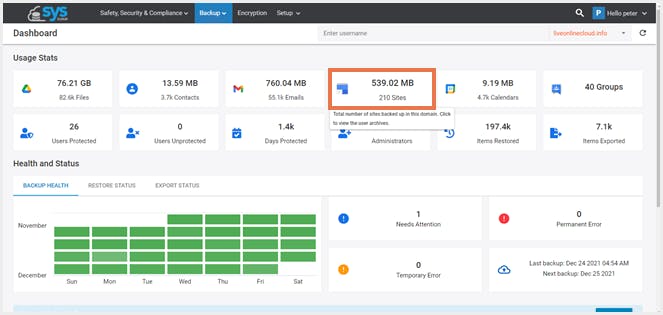
Step 1: From the SysCloud Backup dashboard, click on the ‘Sites’ card. Alternatively, you can navigate to the ‘Archives and Restore’ page from the Backup menu.
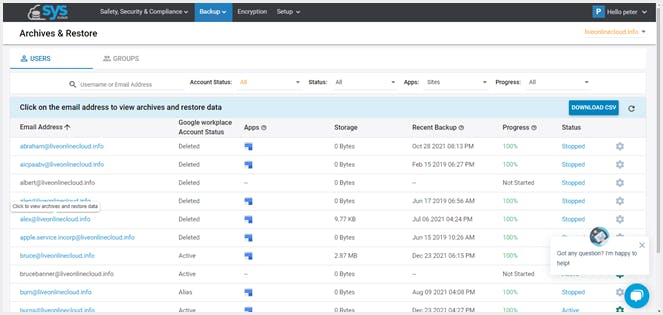
Step 2: Select the owner of the site you want to recover.
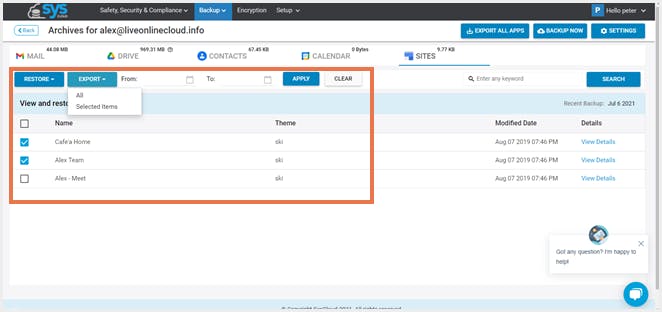
Step 3: Under the ‘Sites’ tab, select the sites you want to recover and click ‘Export’
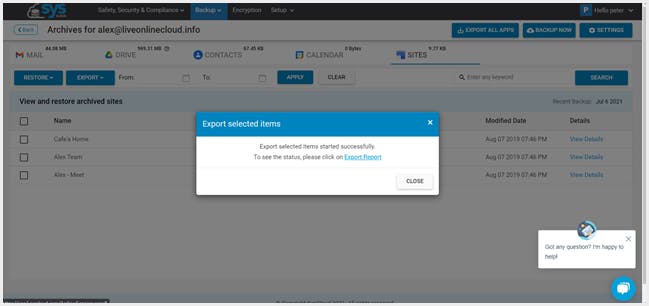
Step 4: Once the files are exported, you can navigate to the ‘Export Report’ tab to download them.
Recommended content
29 Dec 2021
12 min read
5 Jan 2022
11 min read
7th December 2021
11 min read
3 Dec 2021
10 min read
Get actionable SaaS administration insights
We don’t spam. Unsubscribe anytime.
In this article
- Where is Google Sites data stored?
- Backup to another Google account
- Export using Google Takeout
- Retain using Google Vault
- Backup using third-party backup tools

