Categories
In this article
- Backup Google shared drive data using Google Vault
- Backup Google shared drive data using Google Drive for desktop
- Backup Google shared drive data using third-party tools
How to Backup Google Shared Drive?
17 Apr 2025
5 min read
Anju George
Article at a glance
Backing up Google Shared Drives using native tools like Google Vault and Google Drive for desktop has significant limitations.
- Google Vault lacks built-in restore features and cannot handle large-scale data exports, making it an unreliable backup solution.
- Google Drive for desktop, particularly when configured to mirror files, can consume substantial local storage. Additionally, synced files remain vulnerable to accidental modification or deletion on local machines.
Read more
However, since Google does not take responsibility for backing up your data, it is up to IT administrators to ensure that organizational Shared Drive data is regularly backed up—so that important business information remains accessible and protected.

1. Backup Google shared drive data using Google Vault
Google Vault is a retention and eDiscovery tool that allows organizations to retain, search, and export Google Workspace data for legal or compliance purposes. While it is not a traditional backup solution, it can be configured to retain Shared Drive data indefinitely, helping organizations prevent data loss due to user deletion or policy expiration.
Note: Google Vault is included in the following Google Workspace editions: Business Plus, Enterprise, Enterprise Essentials, all Education editions, and G Suite Business. If your organization's edition doesn’t include Vault, you may be able to purchase Vault as an add-on. Check Vault availability by edition.
1.1. How to backup Google shared drive data using Google Vault
Step 1: Sign in to vault.google.com using your admin credentials.
Step 2: Click Retention -> Custom Rules -> Create.


Step 3: Under Service, select Drive and then click CONTINUE.

Step 4: Under Scope:
- To retain data from all Shared Drives in your domain, select All shared drives, then click CONTINUE.
- To retain specific Shared Drives, choose Specific shared drives, select the desired drives, click ADD, then click CONTINUE.


Step 5: Add conditions if needed. You can filter files to retain based on:
- File types
- Date created or modified
- Specific search terms If no conditions are required, simply skip this step and click CONTINUE.
Step 6: Under Duration and action, select Indefinitely. This ensures files from the selected Shared Drives are retained without expiration even if users delete them from the Trash as long as the retention rule is in place.


1.2 Limitations of Google shared drive backup using Google Vault
While Google Vault can be used to retain shared drive data indefinitely, it has serious limitations as a backup alternative. Even Google acknowledges that Vault is not a backup solution. Below are the reasons why one should not use Vault as a backup alternative:
- Without a built-in restore feature, organizations will have a hard time restoring data in the event of data loss.
- Vault exports are not designed for large-scale or high-volume data.
- Google Vault cannot create differential backups or deduplicate data.
- Data will not be accessible in the event of Google outages.
2. Backup Google shared drive data using Google Drive for desktop
Google Drive for desktop is the current desktop sync client that combines the features of the now-deprecated Backup and Sync and Drive File Stream applications. While Backup and Sync supported syncing content from My Drive to your local machine, it did not support syncing files from Shared Drives.
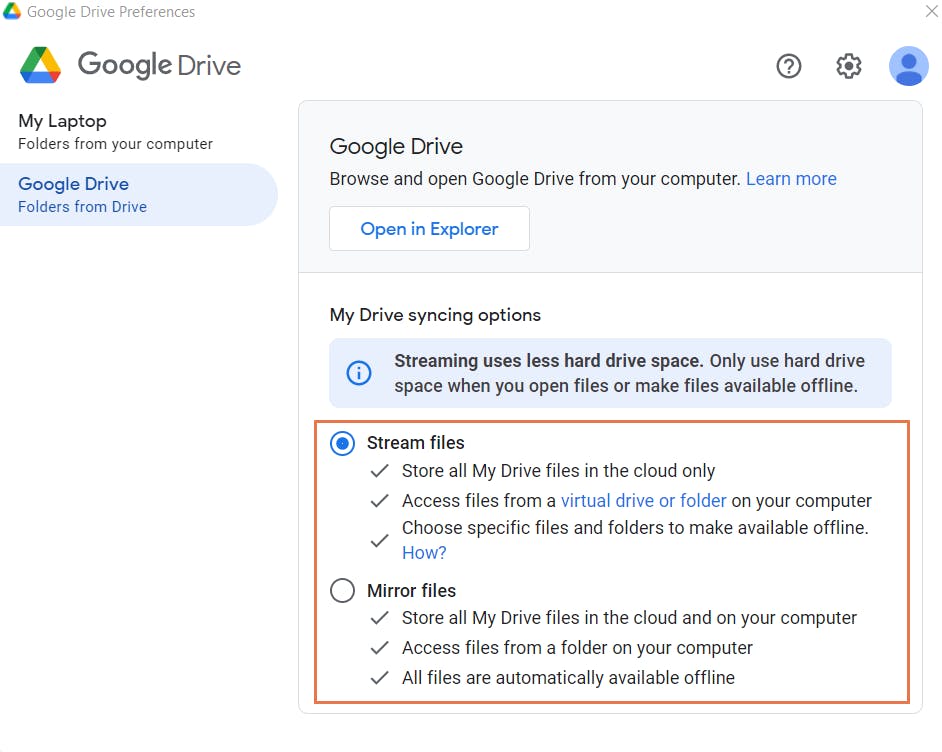
With Google Drive for desktop, users can stream or mirror content from both My Drive and Shared Drives to their computers:
- Stream files to access Google Drive content without consuming local storage.
- Mirror files to store copies locally, which are kept in sync with the cloud.
This allows Shared Drive files to be available locally but it’s important to note that this is a syncing solution, not a true backup method.
2.1. How to backup Google shared drive data using Google Drive for desktop
Step 1: Download Google Drive for desktop and install the application on your PC.
Step 2: Click the Google Drive icon in the taskbar and add your Google Workspace account to Google Drive for desktop. You can also click on Add another account to add another Google Workspace account.

Step 3: Click the gear icon in the upper right corner of the pop-up window and choose Preferences in the dropdown menu.

Step 4: Navigate to Google Drive, choose Stream files or Mirror files as the sync mode to sync Google shared drives to your PC.


Step 5:All the files in shared drives will not be automatically available offline no matter which sync option you choose. You can manually make them available offline. To do this, right-click on the required shared drive and select Available offline in the dropdown menu.

Note: You can only make a Shared Drive available offline if you are a Contributor, Content manager, or Manager. Users with Viewer or Commenter roles cannot enable offline access.
2.2. Limitations of Google shared drive backup using Google Drive for desktop
Consumes local storage: Using the mirror option stores all Shared Drive files on your hard drive, which can quickly fill up disk space—especially with large team drives.
Vulnerable to deletion and changes: Because it’s a sync tool, any file you delete or modify on your PC will reflect in the cloud. There's no version isolation or rollback like a true backup solution.
No protection from device failures or malware: If your system crashes or is affected by ransomware, the locally synced files may be lost or corrupted. Google Drive for desktop doesn't offer recovery or redundancy features to protect against such scenarios.
3. Backup Google shared drive data using third-party tools
Since the native features offered by Google are not designed for the purpose of backup and restore, they have serious limitations as a backup solution. Third-party cloud backup applications, like SysCloud, that are tailor-made for backup and restore are reliable options when it comes to backing up your shared drive data.
SysCloud backup for Google Workspace allows administrators to effortlessly back up all shared drives associated with a Google Workspace account and restore or export them whenever needed. With SysCloud, admins can restore deleted shared drive files with sharing permissions and folder structure intact.
3.1. How to backup Google shared drive data using SysCloud
Step 1: Login to SysCloud using your admin credentials. Go to Jobs and click on Create a new backup job.

Step 2: Enter a name and description (optional) for the backup job and click Next.

Step 3: Add the Google Workspace account that contains the shared drives that need to be backed up. Click Next.

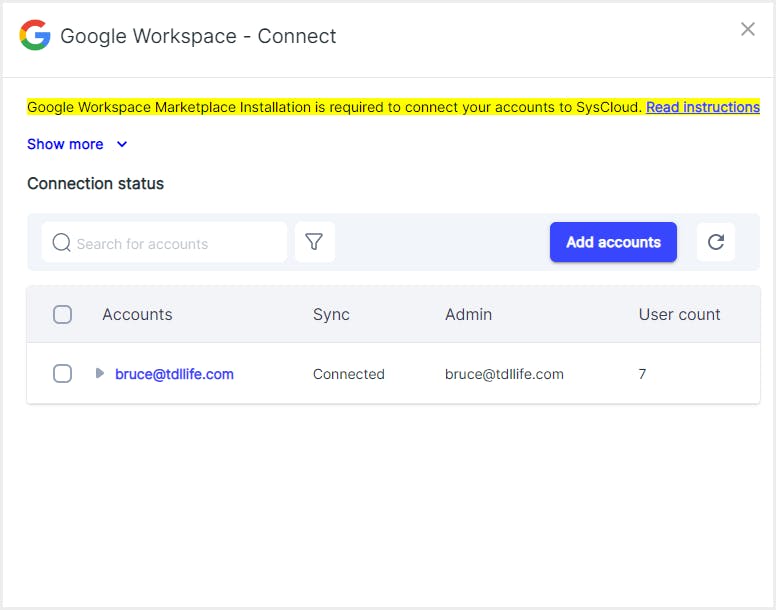
You will have to connect your Google Workspace account to SysCloud if it’s not already connected. Learn how to do this.
Step 4: Under Scope, select the Google Workspace account and the domain for which you need to back up shared drives.
Step 5: Under Apps, select Shared Drive. By default, all shared drives are included in the backup job. To choose specific shared drives, click on the link All Shared Drives selected for backup. In the pop-up box that opens, choose the required shared drives and click Confirm.


Step 6: You can choose to turn on auto-backup if you want to back up all current shared drives as well as any newly created shared drives in the selected domain.

Step 7: Choose how long the shared drives need to be retained. By default, the selected shared drives are retained for an unlimited period. To give a specific retention period, uncheck the Unlimited option and enter the desired retention period. You can also exclude certain files from the backup based on the file type and file size.


Step 8: Once all the selections are made, click Confirm and then click Start backup.
This will back up the selected shared drives. To view the backed-up data, go to Archives -> Shared Drive.
To learn how to recover deleted shared drive data, read our in-depth article How to Recover Deleted Files from Google Shared Drive
Recommended content
16 Apr 2025
6 min read
5 Nov 2023
5 min read
6 Jan 2025
6 min read
Get actionable SaaS administration insights
We don’t spam. Unsubscribe anytime.
In this article
- Backup Google shared drive data using Google Vault
- Backup Google shared drive data using Google Drive for desktop
- Backup Google shared drive data using third-party tools

